The Rival Ice Cream Maker offers a convenient and efficient way to create delicious homemade ice cream. With its compact design and automatic churning, it simplifies the process of crafting custom flavors. Ideal for both beginners and experienced users, it ensures smooth and creamy results every time.
1.1 Overview of the Rival Ice Cream Maker
The Rival Ice Cream Maker is a versatile kitchen appliance designed to produce high-quality, homemade ice cream with ease. Available in various models, it offers features like automatic churning, double-insulated canisters, and compact designs. Popular models include the Rival GC8151 and FRRVBK04, which require no ice or rock salt, making the process convenient. The machine allows for easy customization of flavors and mix-ins, ensuring a personalized ice cream experience. Its user-friendly design and efficient operation make it a favorite among ice cream enthusiasts.
1.2 Benefits of Using a Rival Ice Cream Maker
Using a Rival Ice Cream Maker offers numerous benefits, including the ability to create customizable flavors and healthier alternatives to store-bought options. The automatic churning feature ensures a smooth and creamy texture with minimal effort. Its compact design saves kitchen space, and the double-insulated canister eliminates the need for ice or rock salt. This appliance is both user-friendly and cost-effective, making it a great investment for ice cream lovers.
1.3 Popular Models of Rival Ice Cream Makers
Rival offers a variety of ice cream makers, each designed to meet different needs. Popular models include the Rival GC8151-WN, known for its 1.5-quart gel canister, and the FRRVBK04, a 4-quart option with a robust design. The FRRVBK02-BLU is another favorite, offering a compact 2-quart capacity. These models are praised for their ease of use, durable construction, and ability to produce smooth, creamy results. They cater to both casual and frequent users, ensuring high-quality ice cream at home.
Safety Precautions and Important Safeguards
Always keep the motor unit dry and avoid immersing it in water. Ensure the ice cream canister is thoroughly towel-dried after washing to prevent water spots. Never operate the ice cream maker without the ice cream mixture in the canister. Follow all safety guidelines to ensure safe and efficient use.
2.1 General Safety Guidelines
To ensure safe operation, always keep the motor unit dry and avoid submerging it in water. Never operate the ice cream maker without the ice cream mixture in the canister. After use, thoroughly towel-dry the freezer canister to prevent water spots. Regularly inspect all components for damage and ensure proper assembly before each use. Follow the manufacturer’s instructions carefully to maintain safety and efficiency while making ice cream.
2.2 Electrical Safety Tips
Always handle electrical components with care to avoid shocks or damage. Ensure the motor unit remains dry and never submerge it in water. Use the ice cream maker on a stable, dry surface and avoid overloading the electrical outlet. Never use damaged cords or extensions, as they can pose fire hazards. Keep children away from electrical parts and ensure all components are properly assembled before operation. Follow these guidelines to ensure safe and efficient use of your Rival Ice Cream Maker.
2.3 Preventing Accidents During Use
To ensure safe operation, always ensure the freezer canister is properly centered and engaged with the motor unit. Avoid overfilling the canister, as this can lead to spills during churning. Never use sharp objects to scrape the sides, as this may damage the canister. Keep children away from moving parts and ensure all components are securely assembled. Regularly inspect the machine for wear and tear, addressing any issues promptly to prevent accidents. Always follow the manufacturer’s guidelines for usage and maintenance.
Assembly and Initial Setup
Start by unpacking and inspecting all components to ensure no damage. Familiarize yourself with the motor, canister, and paddle assembly. Prepare the freezer canister according to instructions for optimal performance.
3.1 Unpacking and Inspecting the Ice Cream Maker
Carefully unpack the Rival Ice Cream Maker and ensure all components are included. Inspect for any damage or defects. Familiarize yourself with the motor unit, freezer canister, mixing paddle, and lid. Verify that the canister is dry and free of contaminants. Refer to the manual for a detailed list of parts. Before first use, ensure all components are in good working condition to guarantee proper functionality.
3.2 Understanding the Components of the Rival Ice Cream Maker
The Rival Ice Cream Maker consists of a motor unit, freezer canister, mixing paddle, and lid. The motor unit powers the churning process, while the freezer canister holds the ice cream mixture. The mixing paddle ensures even blending of ingredients. The lid prevents spills and maintains freshness. Each component is designed for ease of use and durability, ensuring a smooth ice cream-making experience. Proper understanding of these parts is essential for optimal performance.
3.3 Preparing the Freezer Canister
Before use, ensure the freezer canister is properly prepared. Wash it with mild soap and rinse thoroughly. Dry with a towel to prevent water spots. Place the canister in the freezer at 0°F (-18°C) for at least 6 hours or overnight. This step ensures the canister is ready to churn your ice cream mixture effectively. Proper preparation guarantees a smooth and consistent churning process for the best results.
Operating the Rival Ice Cream Maker
Place the prepared freezer canister in the machine, add your chilled ice cream mixture, and turn on the motor. Allow it to churn until desired consistency is achieved.
4.1 How to Use Your Ice Cream Maker
To use your Rival Ice Cream Maker, ensure the freezer canister is fully frozen. Place it in the machine, add the motor drive, and pour in your chilled ice cream mixture. Turn on the unit and let it churn until the desired consistency is reached. For best results, pre-freeze the canister for at least 6 hours and keep the mixture cold before churning. Always follow safety guidelines and operating instructions for optimal performance.
4.2 Freezing Time and Temperature Requirements
For optimal performance, the freezer canister must be pre-frozen for at least 6 hours. Ensure the mixture is chilled before adding it to the canister. The ideal freezing temperature is between 0°F and 8°F (-18°C and -13°C). Pre-freezing ensures faster churning and smoother ice cream. Avoid delays by keeping the canister and mixture cold throughout the process. Proper temperature control is essential for achieving the perfect consistency.
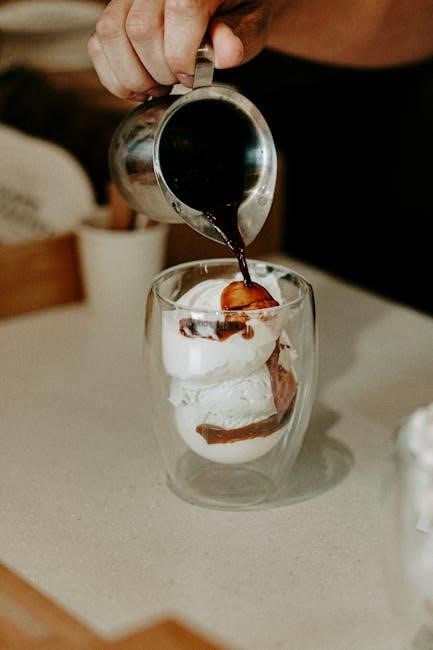
4.3 Adding Ingredients and Mixing
For best results, ensure all ingredients are chilled before use to prevent ice crystals from forming. Combine cream, sugar, flavorings, and mix-ins in a bowl. Pour the mixture into the pre-frozen canister, leaving space for expansion. Avoid overfilling, as this can disrupt the churning process. Start the machine and let it churn until the desired consistency is reached. Add mix-ins like fruits or nuts during the last few minutes of churning for an even distribution.
Churning and Hardening the Ice Cream
The churning process transforms the mixture into a smooth consistency. After churning, transfer the ice cream to an airtight container and freeze for 2-3 hours to harden.
5.1 The Churning Process Explained
The churning process involves agitating the ice cream mixture to incorporate air and break down ice crystals, resulting in a smooth texture. The paddle inside the canister ensures even mixing. It’s important to churn until the mixture reaches a thick, creamy consistency. Over-churning can lead to an icy texture. Ensure the freezer canister is pre-frozen to optimal temperature for best results. Churning typically takes 20-30 minutes, depending on the model. For a lighter texture, churn until soft-serve consistency is achieved.
5.2 How to Harden and Ripen the Ice Cream
After churning, transfer the ice cream to an airtight container and cover it with plastic wrap. Place it in the freezer to harden for at least 2 hours. This step ensures the ice cream becomes scoopable and firm. The ripening process allows flavors to mature, resulting in a smoother and more refined texture. Proper hardening and ripening are crucial for the best taste and consistency.
5.3 Tips for Achieving the Perfect Consistency
For a smooth texture, ensure all ingredients are chilled before churning; Avoid overmixing, as it can create air pockets. Use the right ratio of cream to sugar for balance. Freeze the canister thoroughly to prevent ice crystals. Scrape the sides during churning to incorporate all mix-ins evenly. Proper temperature control and timely freezing are key to achieving the perfect consistency in your homemade ice cream.
Cleaning and Maintenance
Regularly wash the canister and components with mild detergent and dry thoroughly to prevent water spots. Avoid abrasive cleaners to maintain the finish and longevity.
6.1 Cleaning the Ice Cream Maker After Use
After each use, wash the canister, lid, and mixing components with mild soap and warm water. Avoid using abrasive cleaners or scouring pads to prevent damage. Dry all parts thoroughly, especially the freezer canister, to prevent water spots. Regular cleaning ensures optimal performance and maintains hygiene. For tough residue, soak parts in warm soapy water before scrubbing gently. Proper cleaning extends the lifespan of your Rival Ice Cream Maker.
6.2 Drying and Storing the Components
After cleaning, thoroughly dry all parts with a soft towel, paying extra attention to crevices where moisture can accumulate. Allow the freezer canister to air-dry completely to prevent water spots. Store components in a cool, dry place, away from direct sunlight. Ensure the canister is fully dry before storing to avoid frost buildup. Proper drying and storage maintain the longevity and performance of your Rival Ice Cream Maker. Regular checks for moisture are essential.
6.3 Regular Maintenance Tips
Regularly inspect and clean the motor and moving parts to ensure smooth operation. Lubricate the paddle and gears as needed to prevent wear and tear. Check the freezer canister for any damage or dents and replace if necessary. Always follow the manufacturer’s guidelines for maintenance to extend the lifespan of your Rival Ice Cream Maker. Scheduling routine checks helps maintain efficiency and performance over time.
Troubleshooting Common Issues
Common issues include the machine not turning on, uneven mixing, or the canister not freezing. Check the power cord, ensure proper ingredient ratios, and defrost thoroughly if needed.
7.1 Common Problems and Solutions
Common issues with the Rival Ice Cream Maker include the motor not starting, uneven mixing, or the canister not freezing. To address these, ensure the motor is properly assembled, check the power cord, and verify that the canister is fully frozen. If the mixture is too thick, restart the churner with a little more liquid. Regularly cleaning and maintaining the machine can prevent such problems. Always refer to the user manual for specific troubleshooting steps.
7.2 What to Do If the Ice Cream Maker Isn’t Working
If your Rival Ice Cream Maker stops working, first check the power cord and ensure it’s properly plugged in. Verify that the motor is assembled correctly and the canister is fully frozen. If the issue persists, consult the user manual for troubleshooting steps. If the problem remains unresolved, contact Rival customer support or refer to the warranty information provided with your purchase for assistance.
7.3 Warranty and Service Information
Your Rival Ice Cream Maker is backed by a manufacturer’s warranty, covering defects in materials and workmanship. For warranty details, refer to the user manual or contact Rival’s customer service. If your unit requires repair, visit the official website for service center locations or call the support hotline. Proper maintenance and adherence to usage guidelines ensure warranty validity, providing peace of mind for your investment.
Advanced Techniques and Recipes
Discover advanced techniques for crafting unique ice cream flavors. Customize recipes with mix-ins, layer flavors, and create gourmet desserts. Explore endless possibilities with your Rival Ice Cream Maker.
8.1 Customizing Your Ice Cream Recipes
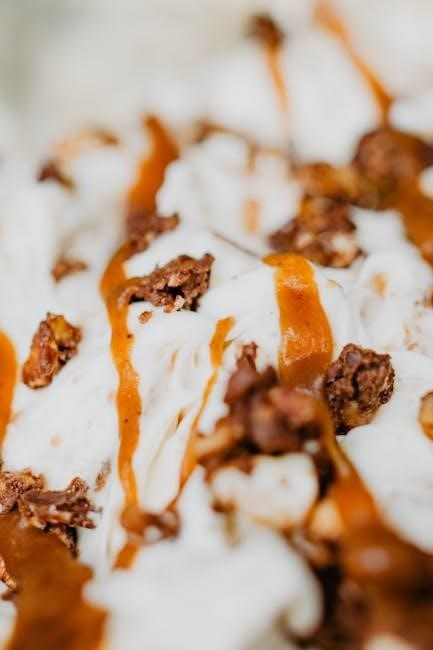
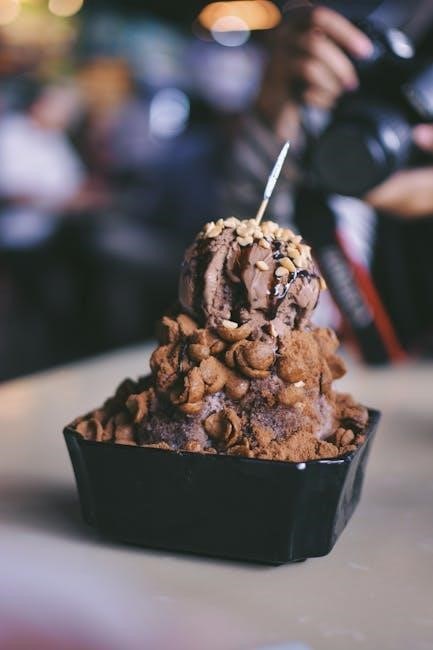
Customizing your ice cream recipes is easy with the Rival Ice Cream Maker. Experiment with unique flavors by adding mix-ins like fruits, nuts, or candy pieces. Try blending creamy bases with cocoa powder for chocolate ice cream or steeping vanilla beans for a rich, aromatic flavor. For a lighter texture, incorporate whipped cream or Greek yogurt. The possibilities are endless, allowing you to create personalized treats that suit every taste preference.
8.2 Adding Mix-Ins and Flavorings
Enhance your ice cream by adding mix-ins like fresh fruits, nuts, or candy pieces during the churning process. For best results, fold in larger ingredients toward the end to preserve texture. Flavorings such as extracts, cocoa powder, or zest can be incorporated into the base mixture before freezing. Experiment with layered flavors by adding ingredients at different stages for a unique and delicious twist to your homemade creations.
8;3 Creating Unique and Gourmet Flavors
Elevate your ice cream game by crafting unique and gourmet flavors. Try infusing with premium ingredients like matcha, balsamic fig, or browned butter for sophisticated taste. Experiment with layered flavors by adding liquors or espresso for adult-only treats. For texture, mix in caramel ribbons, toasted nuts, or fresh berries. Ensure ingredients are fresh and high-quality to achieve the best results. Let your creativity shine and invent one-of-a-kind flavors tailored to your palate.
Accessories and Attachments
Enhance your ice cream maker experience with optional accessories like the mixing feeder cover for easy ingredient addition and extra canisters for expanded capacity. These attachments ensure convenience and flexibility, allowing you to create more with minimal effort. Cleaning and storage are also simplified with these practical additions.
9.1 Optional Accessories for the Rival Ice Cream Maker
The Rival Ice Cream Maker offers a range of optional accessories to enhance your ice cream-making experience. These include a mixing feeder cover, which prevents spills during ingredient addition, and additional freezer canisters for increased capacity. A paddle extender and drip tray are also available, ensuring efficient churning and easy cleanup. These accessories provide convenience, flexibility, and improved performance, making the ice cream-making process even more enjoyable and efficient.
9.2 Using the Mixing Feeder Cover
The mixing feeder cover is a handy accessory designed to streamline the process of adding ingredients. Simply place the cover on top of the ice cream maker during operation, allowing mix-ins like chocolate chips, nuts, or fruit to be added smoothly. This prevents spills and ensures even distribution of ingredients, enhancing the texture and flavor of your homemade ice cream without interrupting the churning process.
9.3 Other Helpful Accessories
Enhance your ice cream-making experience with practical accessories. The freezer canister ensures even freezing, while the clear lid allows easy monitoring. Additional components like the dasher and paddle improve mixing efficiency. Optional storage containers and cleaning brushes help maintain hygiene and organization. These accessories simplify the process, making it easier to achieve professional-quality results at home.
Comparing Rival Ice Cream Makers to Other Brands
Rival ice cream makers stand out for their ease of use and consistent results. They offer a compact design and efficient freezing, making them a top choice for home use.
10.1 Key Features of Rival vs. Competitors
Rival ice cream makers are known for their compact design, automatic churning, and double-insulated canisters, eliminating the need for ice or rock salt. Competitors often require more manual effort or bulky setups. Rival’s user-friendly interface and efficient freezing capabilities make it a top choice for home use, offering consistent results with minimal effort. Models like the GC8151 also feature spill-proof lids and easy cleaning, enhancing overall convenience and durability compared to other brands.
10.2 Why Choose a Rival Ice Cream Maker?
Rival ice cream makers are a top choice for their reliability, efficiency, and ease of use. They offer a range of models to suit different needs, from compact 1-quart makers to larger 6-quart machines. With features like double-insulated canisters and automatic churning, Rival ensures smooth, creamy results without the hassle of ice or salt. Their durable construction and user-friendly designs make them a favorite among both beginners and experienced users, providing long-term satisfaction and versatility for crafting custom flavors.
10.3 User Reviews and Comparisons
Users consistently praise Rival ice cream makers for their performance and ease of use. Many highlight the GC8151 and FRRVBK04 models for their durability and consistent results. Reviews often mention the convenience of double-insulated canisters and compact designs, which set Rival apart from competitors. Comparisons frequently note that Rival makers are more efficient and produce creamier textures than other brands, making them a top choice for home enthusiasts and small-scale producers alike.
Storage and Transportation Tips
Properly store the Rival Ice Cream Maker by ensuring all parts are clean and dry. For transportation, disassemble and pack components securely, using original packaging if possible.
11.1 Proper Storage of the Ice Cream Maker
After use, ensure all components are thoroughly cleaned and dried to prevent moisture damage. Store the ice cream maker in a cool, dry place, away from direct sunlight. Cover the unit to protect it from dust. Keep the freezer canister and other parts organized in a secure location to maintain their condition. Always check the manufacturer’s guidelines for specific storage recommendations to preserve the longevity of your Rival Ice Cream Maker.
11.2 How to Transport the Ice Cream Maker Safely
When transporting your Rival Ice Cream Maker, ensure all parts are securely packed to avoid movement. Use the original packaging if available, or wrap components in protective material. Place the unit in an upright position to prevent damage. Avoid exposing it to extreme temperatures or impacts. Always handle the appliance with care, keeping it away from children during transit to ensure safe and secure transportation of your ice cream maker.
11.3 Long-Term Storage Solutions
For long-term storage, ensure your Rival Ice Cream Maker is clean and completely dry. Store components separately in a cool, dry place to prevent rust or damage. Use the original packaging if available, or wrap parts securely to avoid scratching. Keep the unit away from direct sunlight and moisture to maintain its condition. Regularly inspect stored items to ensure they remain in good working order for future use.
12.1 Summary of the Rival Ice Cream Maker Experience
The Rival Ice Cream Maker offers a delightful and user-friendly experience, allowing you to craft creamy, personalized desserts effortlessly. With its efficient design and automatic churning, it ensures smooth results every time. From classic flavors to unique creations, this machine empowers you to explore endless possibilities. Its ease of use, combined with durable construction, makes it a joy to own and operate, providing years of delicious homemade treats for you and your family to enjoy.
12.2 Encouragement to Try New Recipes
Don’t be afraid to experiment with unique flavors and ingredients! Your Rival Ice Cream Maker is the perfect tool for creating one-of-a-kind desserts. Try mixing in fresh fruits, nuts, or even candy pieces for a personalized touch. From classic vanilla to gourmet combinations, the possibilities are endless. Each batch is an opportunity to innovate, so let your creativity shine and enjoy the satisfaction of crafting something truly special.
12.3 Final Tips for Getting the Most Out of Your Rival Ice Cream Maker
To maximize your Rival Ice Cream Maker’s potential, always follow the manual’s guidelines for freezing times and ingredient ratios. Regularly clean and maintain the machine to ensure optimal performance. Experiment with new flavors and mix-ins to keep your creations fresh and exciting. Proper storage and timely churning will help you achieve the perfect consistency every time. Happy churning!